How to Use Input Decorator in Angular
In this article, We will learn, how to send data from parent components to one or more child components with the help of @Input Angular decorator. The @Input decorator is part of the angular core library and it is imported from the @angular/core module.

What is @Input Decorator?
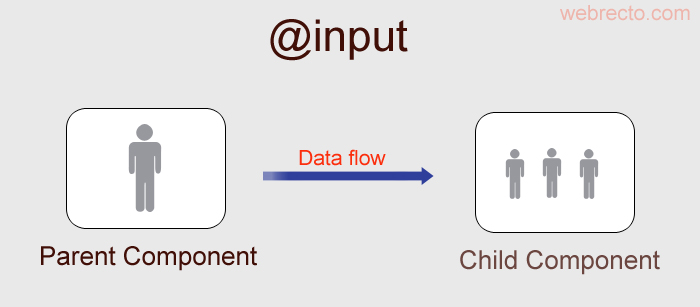
The @Input decorator is a common type of pattern in angular. It is used to share data between parent to child components and directives. The child component always receives data from the parent component. But parent component does not receive any data from the child component with the help of the @input decorator. In application, the parent component uses the property binding to bind a component property.
Syntax
Find the use of @Input decorator with string data type.
@Input() myInputData:string;
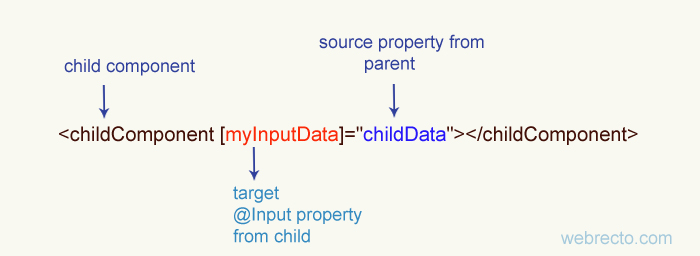
<child-component [myInputData]="childData"></child-component>
Using property binding in the parent component
1: First, create a parent component in the application and create one variable to store any data for sending to the child component.
2: Next, we create one child component to use parent data, and we will configure the child component in the parent component for receiving data.
3: We will use property binding to bind the myInputData property in the child to the childData property of the parent.
4: In the parent component, We assign value to the childData variable.

Setting up Data in Child Component
In the child component, first, we import the input decorator from the core library. The @Input decorator receives data from the parent component. The myInputData decorator is the string type but it can receive any type of data like number, string, object, or boolean.
import { Component, Input } from '@angular/core'; // First, import Input
export class ChildComponent {
  @Input() myInputData = ''; // decorate the property with @Input()
}
Using Input decorator in 3 different ways
We can use @Input decorator in three different ways in the application.
1) Plain
Plain ways are the basic way to use @input decorator in the child component.
@Input() myInputData: string;
<child-component myInputData="Hi Webrecto"></child-component>
In the child component, I have myInputData name's variable and we assign @input decorator for the variable. The DOM property of the parent component will use the same name variable.
2) Alias
Alias is one of the most common ways to define @input decorator in the child component. This alias name will be different from the variable and we can use it as an argument in the @input decorator.
@Input('mydata') myInputData: string;
<p>{{ myInputData }}</p> // we use mydata variable for dispaly in component.
Here, we give an alias name mydata in the @Input decorator to the myInputData name variable. In the child component, we will use mydata alias in interpolation for display data.
3) Setter Getter
In this way, we use the set and get method to display data in uppercase or lowercase with the help of a pipe.
private myinfo: string;

@Input()
set message(myInputData: string) {
 this.myinfo = myInputData && myInputData.toUpperCase();
}

get message() {
 return this.myinfo;
}
<p>{{ myinfo }}</p> // we use myinfo to display data.
Complete Example
We will provide a complete example of @Input decorator. In our example, the app component is the parent component and we will create three child components. All child components will use the @Input decorator to display messages.
app.component.ts
import { Component } from '@angular/core';

@Component({
  selector: 'app-root',
  styleUrls: ['./app.component.css'],
  template: `
        <h2>@Input decorator example</h2>
        <child-one [myInputData]= "childData"></child-one>
        <child-two [mydata]= "childData"></child-two>
        <child-three [message]= "childData"></child-three>
    `})
export class AppComponent {
  childData = 'Hello webrecto';
}
child-one.component.ts
import { Component, Input } from '@angular/core';

@Component({
  selector: 'child-one',
  template: `
  <p>First child component- <b>Plain</b></p>
  <p>{{myInputData}}</p>
    `
})
export class ChildOneComponent  {
    @Input()
	myInputData : string = '';
}
child-two.component.ts
import { Component, Input } from '@angular/core';

@Component({
  selector: 'child-two',
  template: `
        <p>First child component- <b>Alias</b></p>
        <p>{{myInputData}}</p>
    `
})
export class ChildTwoComponent  {
    @Input("mydata")
	myInputData : string = '';
}
child-three.component.ts
import { Component, Input } from '@angular/core';

@Component({
  selector: 'child-three',
  template: `
        <p>First child component- <b>Setter Getter</b></p>
        <p>{{message}}</p>
    `
})
export class ChildThreeComponent  {
    private msg: string = '';

    @Input()
    set message(inputMessage: string) {
        this.msg = inputMessage && inputMessage.toUpperCase();
    }

    get message() {
        return this.msg;
    }
}
app.module.ts
import { NgModule } from '@angular/core';
import { BrowserModule } from '@angular/platform-browser';

import { AppRoutingModule } from './app-routing.module';
import { AppComponent } from './app.component';
import { ChildOneComponent } from './child-one.component';
import { ChildTwoComponent } from './child-two.component';
import { ChildThreeComponent } from './child-three.component';

@NgModule({
  declarations: [
    AppComponent,
    ChildOneComponent,
    ChildTwoComponent,
    ChildThreeComponent
  ],
  imports: [
    BrowserModule,
    AppRoutingModule
  ],
  providers: [],
  bootstrap: [AppComponent]
})
export class AppModule { }
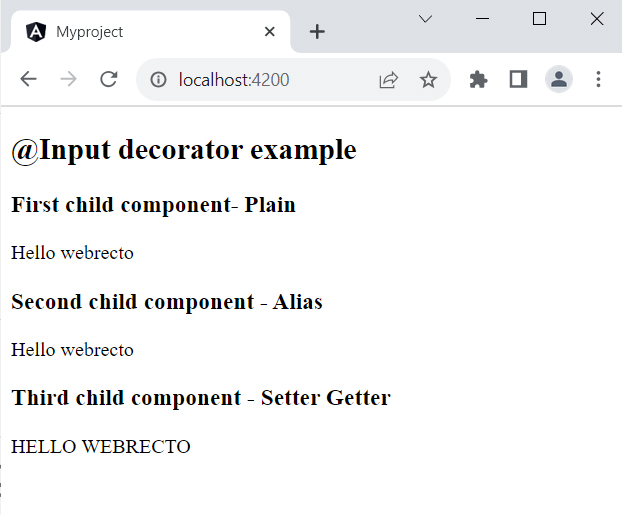
Find the print screen of the output.

